村岡です。Android系スマートグラスのアプリ開発とかやってるんですが、やればやるほど「スマートグラスのホームがアプリランチャーってどうよ?」みたいに思ってきました。
スマートグラスの使用感として最初にアプリ選択して起動とかなんか違う気がするし、そもそも選ぶにしてもただのランチャーからってのがこれじゃない感があるんですよね。
で、いまんとこいいアイデアがないのでとりあえずいろいろ試してみようと思ってとりあえずAndroidのホームアプリをつくってみようと思った。
http://code.tutsplus.com/tutorials/build-a-custom-launcher-on-android–cms-21358を参考にさせていただきました。
開発環境
- Android Studio 2.0
- Android SDK
- Genymotion - Custom Phone 4.4.4 API19
手順
Android Studioで新規プロジェクトを作成する。名前はてきとーに My Custom Launcherとした。

Min SDK versionは19。いま手元にあるTelepathy walkerが4.4なのでそれに合わせた感じ深い意味は無い。

初期Activityレイアウトの選択。Empty Activityでもよかったんだけど、今回は試しにFullScreenを選択してみた。もしかしたらアリかもしれないので。

Activity NameをHomeActivity、Layout XML名をactivity_homeにした。

プロジェクトが作成されたらAndroidManifest.xmlを編集する。
intent-filterにandroid.intent.category.HOMEとandroid.intent.category.DEFAULTを追加する。android.intent.category.HOMEがAndroidが起動時に起動するアプリという指定。つまりホーム画面用アプリのミソ。

<?xml version="1.0" encoding="utf-8"?>
<manifest xmlns:android="http://schemas.android.com/apk/res/android"
    package="com.bathtimefish.mycustomlauncher">

    <application
        android:allowBackup="true"
        android:icon="@mipmap/ic_launcher"
        android:label="@string/app_name"
        android:supportsRtl="true"
        android:theme="@style/AppTheme">
        <activity
            android:name=".HomeActivity"
            android:configChanges="orientation|keyboardHidden|screenSize"
            android:label="@string/app_name"
            android:theme="@style/FullscreenTheme"
            android:launchMode="singleTask"
            android:stateNotNeeded="true">
            <intent-filter>
                <action android:name="android.intent.action.MAIN" />
                <category android:name="android.intent.category.LAUNCHER" />
                <category android:name="android.intent.category.HOME" />
                <category android:name="android.intent.category.DEFAULT" />
            </intent-filter>
        </activity>
    </application>

</manifest>
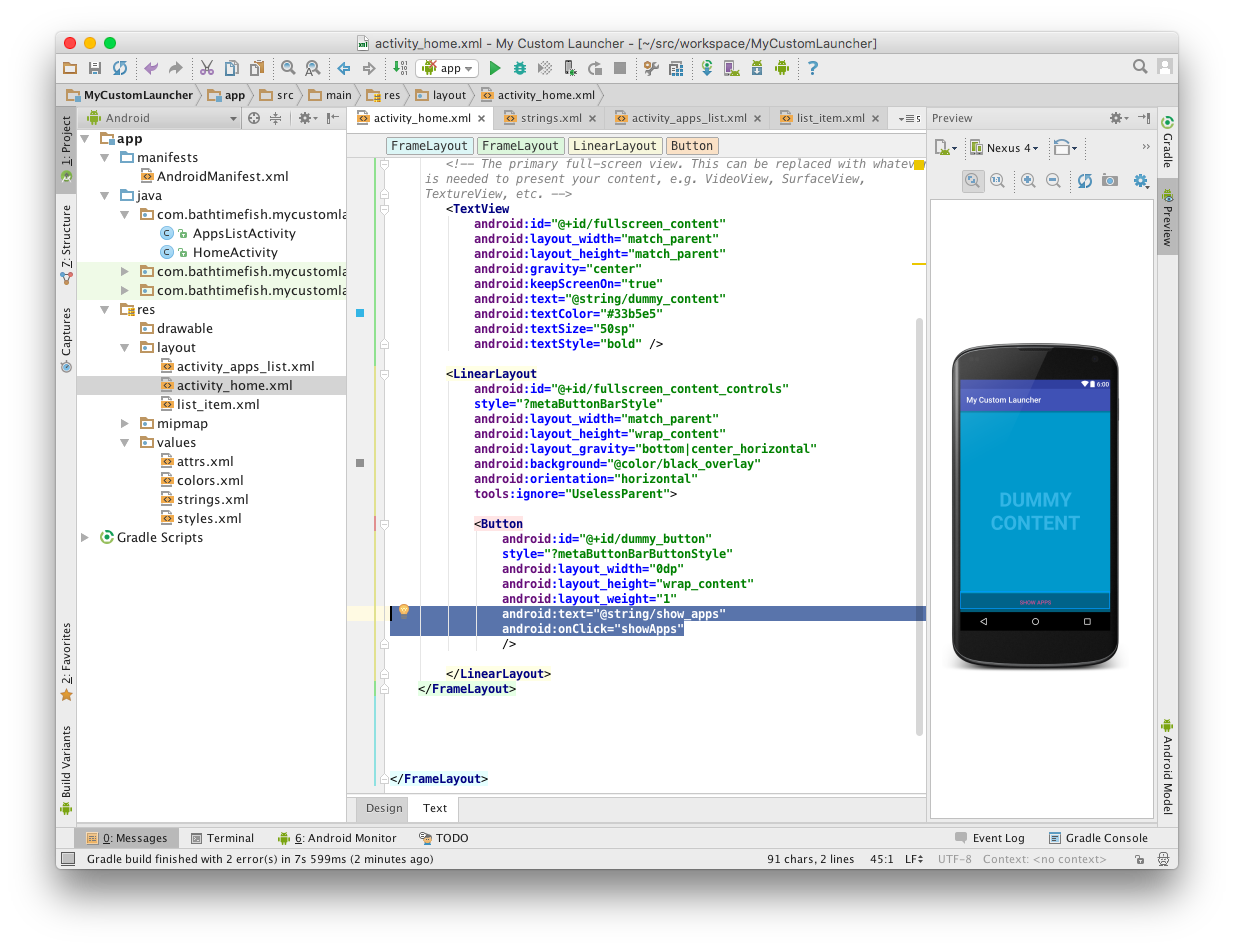
res/layout/activity_home.xmlを開いて以下のように編集する。
<FrameLayout xmlns:android="http://schemas.android.com/apk/res/android"
    xmlns:tools="http://schemas.android.com/tools"
    android:layout_width="match_parent"
    android:layout_height="match_parent"
    android:background="#0099cc"
    tools:context="com.bathtimefish.mycustomlauncher.HomeActivity">

    <!-- This FrameLayout insets its children based on system windows using
     android:fitsSystemWindows. -->
    <FrameLayout
        android:layout_width="match_parent"
        android:layout_height="match_parent"
        android:fitsSystemWindows="true">

        <!-- The primary full-screen view. This can be replaced with whatever view
     is needed to present your content, e.g. VideoView, SurfaceView,
     TextureView, etc. -->
        <TextView
            android:id="@+id/fullscreen_content"
            android:layout_width="match_parent"
            android:layout_height="match_parent"
            android:gravity="center"
            android:keepScreenOn="true"
            android:text="@string/dummy_content"
            android:textColor="#33b5e5"
            android:textSize="50sp"
            android:textStyle="bold" />

        <LinearLayout
            android:id="@+id/fullscreen_content_controls"
            style="?metaButtonBarStyle"
            android:layout_width="match_parent"
            android:layout_height="wrap_content"
            android:layout_gravity="bottom|center_horizontal"
            android:background="@color/black_overlay"
            android:orientation="horizontal"
            tools:ignore="UselessParent">

            <Button
                android:id="@+id/dummy_button"
                style="?metaButtonBarButtonStyle"
                android:layout_width="0dp"
                android:layout_height="wrap_content"
                android:layout_weight="1"
                android:text="@string/show_apps"
                android:onClick="showApps"
                />

        </LinearLayout>
    </FrameLayout>
</FrameLayout>
res/values/string.xmlにshow_appsを追加する

<resources>
    <string name="app_name">My Custom Launcher</string>

    <string name="dummy_button">Dummy Button</string>
    <string name="show_apps">Show Apps</string>
    <string name="dummy_content">DUMMY\nCONTENT</string>
</resources>
res/layout/activity_apps_list.xmlを新規作成する


activity_apps_list.xmlを以下のように編集する。ListViewをいっこ追加

<?xml version="1.0" encoding="utf-8"?>
<LinearLayout xmlns:android="http://schemas.android.com/apk/res/android"
    android:orientation="vertical" android:layout_width="match_parent"
    android:layout_height="match_parent">

    <ListView
        android:id="@+id/apps_list"
        android:layout_width="match_parent"
        android:layout_height="match_parent"
        >
    </ListView>

</LinearLayout>
list_item.xmlを新規作成する。Root ElementはRelativeLayout。


res/layout/list_item.xmlを以下のように編集する。アプリアイコンのImageView、アプリラベル、アプリ名のTextView

<?xml version="1.0" encoding="utf-8"?>
<RelativeLayout xmlns:android="http://schemas.android.com/apk/res/android"
    android:layout_width="match_parent"
    android:layout_height="match_parent"
    android:padding="10dp">

    <ImageView
        android:id="@+id/item_app_icon"
        android:layout_width="wrap_content"
        android:layout_height="wrap_content"
        android:layout_alignParentLeft="true"
        android:layout_centerVertical="true"
        />

    <TextView
        android:id="@+id/item_app_label"
        android:layout_width="wrap_content"
        android:layout_height="wrap_content"
        android:layout_toRightOf="@+id/item_app_icon"
        android:paddingLeft="10dp"
        />

    <TextView
        android:id="@+id/item_app_name"
        android:layout_width="wrap_content"
        android:layout_height="wrap_content"
        android:layout_below="@+id/item_app_label"
        android:layout_toRightOf="@+id/item_app_icon"
        android:paddingLeft="10dp"
        />

</RelativeLayout>
HomeActivityを開いて以下のように編集する。やってることはshowApps()の追加のみ
あと使ってないfindViewById(R.id.dummy_button).setOnTouchListener(mDelayHideTouchListener);のコメントアウト
package com.bathtimefish.mycustomlauncher;

import android.annotation.SuppressLint;
import android.app.Activity;
import android.net.Uri;
import android.support.v7.app.ActionBar;
import android.support.v7.app.AppCompatActivity;
import android.os.Bundle;
import android.os.Handler;
import android.view.MotionEvent;
import android.view.View;
import android.content.Intent;

/**
 * An example full-screen activity that shows and hides the system UI (i.e.
 * status bar and navigation/system bar) with user interaction.
 */
public class HomeActivity extends AppCompatActivity {
    /**
     * Whether or not the system UI should be auto-hidden after
     * {@link #AUTO_HIDE_DELAY_MILLIS} milliseconds.
     */
    private static final boolean AUTO_HIDE = true;

    /**
     * If {@link #AUTO_HIDE} is set, the number of milliseconds to wait after
     * user interaction before hiding the system UI.
     */
    private static final int AUTO_HIDE_DELAY_MILLIS = 3000;

    /**
     * Some older devices needs a small delay between UI widget updates
     * and a change of the status and navigation bar.
     */
    private static final int UI_ANIMATION_DELAY = 300;
    private final Handler mHideHandler = new Handler();
    private View mContentView;
    private final Runnable mHidePart2Runnable = new Runnable() {
        @SuppressLint("InlinedApi")
        @Override
        public void run() {
            // Delayed removal of status and navigation bar

            // Note that some of these constants are new as of API 16 (Jelly Bean)
            // and API 19 (KitKat). It is safe to use them, as they are inlined
            // at compile-time and do nothing on earlier devices.
            mContentView.setSystemUiVisibility(View.SYSTEM_UI_FLAG_LOW_PROFILE
                    | View.SYSTEM_UI_FLAG_FULLSCREEN
                    | View.SYSTEM_UI_FLAG_LAYOUT_STABLE
                    | View.SYSTEM_UI_FLAG_IMMERSIVE_STICKY
                    | View.SYSTEM_UI_FLAG_LAYOUT_HIDE_NAVIGATION
                    | View.SYSTEM_UI_FLAG_HIDE_NAVIGATION);
        }
    };
    private View mControlsView;
    private final Runnable mShowPart2Runnable = new Runnable() {
        @Override
        public void run() {
            // Delayed display of UI elements
            ActionBar actionBar = getSupportActionBar();
            if (actionBar != null) {
                actionBar.show();
            }
            mControlsView.setVisibility(View.VISIBLE);
        }
    };
    private boolean mVisible;
    private final Runnable mHideRunnable = new Runnable() {
        @Override
        public void run() {
            hide();
        }
    };
    /**
     * Touch listener to use for in-layout UI controls to delay hiding the
     * system UI. This is to prevent the jarring behavior of controls going away
     * while interacting with activity UI.
     */
    private final View.OnTouchListener mDelayHideTouchListener = new View.OnTouchListener() {
        @Override
        public boolean onTouch(View view, MotionEvent motionEvent) {
            if (AUTO_HIDE) {
                delayedHide(AUTO_HIDE_DELAY_MILLIS);
            }
            return false;
        }
    };

    @Override
    protected void onCreate(Bundle savedInstanceState) {
        super.onCreate(savedInstanceState);

        setContentView(R.layout.activity_home);

        mVisible = true;
        mControlsView = findViewById(R.id.fullscreen_content_controls);
        mContentView = findViewById(R.id.fullscreen_content);

        // Set up the user interaction to manually show or hide the system UI.
        mContentView.setOnClickListener(new View.OnClickListener() {
            @Override
            public void onClick(View view) {
                toggle();
            }
        });

        // Upon interacting with UI controls, delay any scheduled hide()
        // operations to prevent the jarring behavior of controls going away
        // while interacting with the UI.
        //findViewById(R.id.dummy_button).setOnTouchListener(mDelayHideTouchListener);
    }

    // ボタンクリック時の処理
    public void showApps(View v) {
        Intent i = new Intent(HomeActivity.this, AppsListActivity.class);
        startActivity(i);
    }

    @Override
    protected void onPostCreate(Bundle savedInstanceState) {
        super.onPostCreate(savedInstanceState);

        // Trigger the initial hide() shortly after the activity has been
        // created, to briefly hint to the user that UI controls
        // are available.
        delayedHide(100);
    }

    private void toggle() {
        if (mVisible) {
            hide();
        } else {
            show();
        }
    }

    private void hide() {
        // Hide UI first
        ActionBar actionBar = getSupportActionBar();
        if (actionBar != null) {
            actionBar.hide();
        }
        mControlsView.setVisibility(View.GONE);
        mVisible = false;

        // Schedule a runnable to remove the status and navigation bar after a delay
        mHideHandler.removeCallbacks(mShowPart2Runnable);
        mHideHandler.postDelayed(mHidePart2Runnable, UI_ANIMATION_DELAY);
    }

    @SuppressLint("InlinedApi")
    private void show() {
        // Show the system bar
        mContentView.setSystemUiVisibility(View.SYSTEM_UI_FLAG_LAYOUT_FULLSCREEN
                | View.SYSTEM_UI_FLAG_LAYOUT_HIDE_NAVIGATION);
        mVisible = true;

        // Schedule a runnable to display UI elements after a delay
        mHideHandler.removeCallbacks(mHidePart2Runnable);
        mHideHandler.postDelayed(mShowPart2Runnable, UI_ANIMATION_DELAY);
    }

    /**
     * Schedules a call to hide() in [delay] milliseconds, canceling any
     * previously scheduled calls.
     */
    private void delayedHide(int delayMillis) {
        mHideHandler.removeCallbacks(mHideRunnable);
        mHideHandler.postDelayed(mHideRunnable, delayMillis);
    }

    @Override
    public void onStart() {
        super.onStart();

    }

    @Override
    public void onStop() {
        super.onStop();

    }
}
AppsListActivityを新規作成する


AppsListActivityを以下のように編集する
package com.bathtimefish.mycustomlauncher;

/**
 * Created by btf on 2016/04/17.
 */
import android.app.Activity;
import android.content.Intent;
import android.net.Uri;
import android.os.Bundle;
import android.view.View;
import android.content.pm.PackageInfo;
import android.content.pm.PackageManager;
import android.content.pm.PackageManager.NameNotFoundException;
import android.content.pm.ResolveInfo;
import java.util.List;
import java.util.ArrayList;
import android.widget.ListView;
import android.widget.ArrayAdapter;
import android.view.ViewGroup;
import android.widget.ImageView;
import android.widget.TextView;
import android.widget.AdapterView;

public class AppsListActivity extends Activity {

    @Override
    protected void onCreate(Bundle savedInstanceState) {
        super.onCreate(savedInstanceState);
        setContentView(R.layout.activity_apps_list);
        loadApps();
        loadListView();
        addClickListener();
    }

    private PackageManager manager;
    private List<AppDetail> apps;

    private void loadApps() {
        manager = getPackageManager();
        apps = new ArrayList<AppDetail>();

        Intent i = new Intent(Intent.ACTION_MAIN, null);
        i.addCategory(Intent.CATEGORY_LAUNCHER);

        List<ResolveInfo> availableActivities = manager.queryIntentActivities(i, 0);
        for(ResolveInfo ri : availableActivities){
            AppDetail app = new AppDetail();
            app.label = ri.loadLabel(manager);
            app.name = ri.activityInfo.packageName;
            app.icon = ri.activityInfo.loadIcon(manager);
            apps.add(app);
        }

    }

    private ListView list;

    private void loadListView() {
        list = (ListView) findViewById(R.id.apps_list);

        ArrayAdapter<AppDetail> adapter = new ArrayAdapter<AppDetail>(this,
                R.layout.list_item,
                apps) {
            @Override
            public View getView(int position, View convertView, ViewGroup parent) {
                if (convertView == null) {
                    convertView = getLayoutInflater().inflate(R.layout.list_item, null);
                }

                ImageView appIcon = (ImageView) convertView.findViewById(R.id.item_app_icon);
                appIcon.setImageDrawable(apps.get(position).icon);

                TextView appLabel = (TextView) convertView.findViewById(R.id.item_app_label);
                appLabel.setText(apps.get(position).label);

                TextView appName = (TextView) convertView.findViewById(R.id.item_app_name);
                appName.setText(apps.get(position).name);

                return convertView;
            }
        };

        list.setAdapter(adapter);
    }

    private void addClickListener() {
        list.setOnItemClickListener(new AdapterView.OnItemClickListener() {
            @Override
            public void onItemClick(AdapterView<?> av, View v, int pos,
                                    long id) {
                Intent i = manager.getLaunchIntentForPackage(apps.get(pos).name.toString());
                AppsListActivity.this.startActivity(i);
            }
        });
    }

    @Override
    public void onStart() {
        super.onStart();

    }

    @Override
    public void onStop() {
        super.onStop();

    }
}
AndroidManifest.xmlのApplication内に <activity android:name=".AppsListActivity"></activity>を追加する

この時点でビルドしてGenymotionで実行してみる。フルスクリーンでアプリが起動する。初期状態ではFrameLayout直下のTextViewのみが表示される

画面をタップするとヘッダやボタン部のLinerLayoutが表示される

ホームボタンをクリックするとランチャー選択ダイアログが表示される。My Custom Launcherを選択してAlwaysをクリックすると以降のホーム画面がMy Custom Launcherとなる。以降のホーム画面変更は Settings -> Home で可能

AppDetailクラスを新規作成する。アプリランチャーの表示項目の部分

AppDetail.javaを以下のように編集する
package com.bathtimefish.mycustomlauncher;

/**
 * Created by btf on 2016/04/17.
 */

import android.graphics.drawable.Drawable;

public class AppDetail {
    CharSequence label;
    CharSequence name;
    Drawable icon;
}
ビルドして実行する。Show Appsボタンをタップするとインストールされているアプリ一覧が表示される。


とりあえずカスタムホームアプリができてアプリランチャーぽいのができました。
さてここからスマートグラス用のUIをどう考えていくか?いろいろ試行錯誤してみようと思います。